

How To Cover A Roof Leak With A Tarp
Apr 22nd 2025
Time is not your friend when roof leaks develop. Even a small drip can turn into a major headache if left unchecked. Water seeping through your roof doesn't just stay in the attic; it can soak insulation, stain ceilings, warp wood framing and invite mold into your home. Worse yet, long-term leaks can compromise the structural integrity of your roof, leading to costly repairs down the road.
Acting fast can mean the difference between a temporary fix and a full-blown roof replacement. That's where a tarp comes into the picture. Tarps are a dependable short-term solution that buys you time until a permanent repair.
Safety First
Before you even think about climbing up on that roof, let's talk safety. Covering a roof leak with a tarp might sound simple, but working at heights always involves risk, especially when the roof is wet, the wind's still blowing or your footing is uncertain. A little planning and the right precautions can get the job done without injury.
Wait for Safe Weather
Timing is everything. Keep in mind that wet shingles are slicker than you think, and wind gusts can make handling a large tarp feel like wrestling a parachute. If a storm just rolled through, give it time. Let the roof dry out as much as possible and wait for calmer skies.
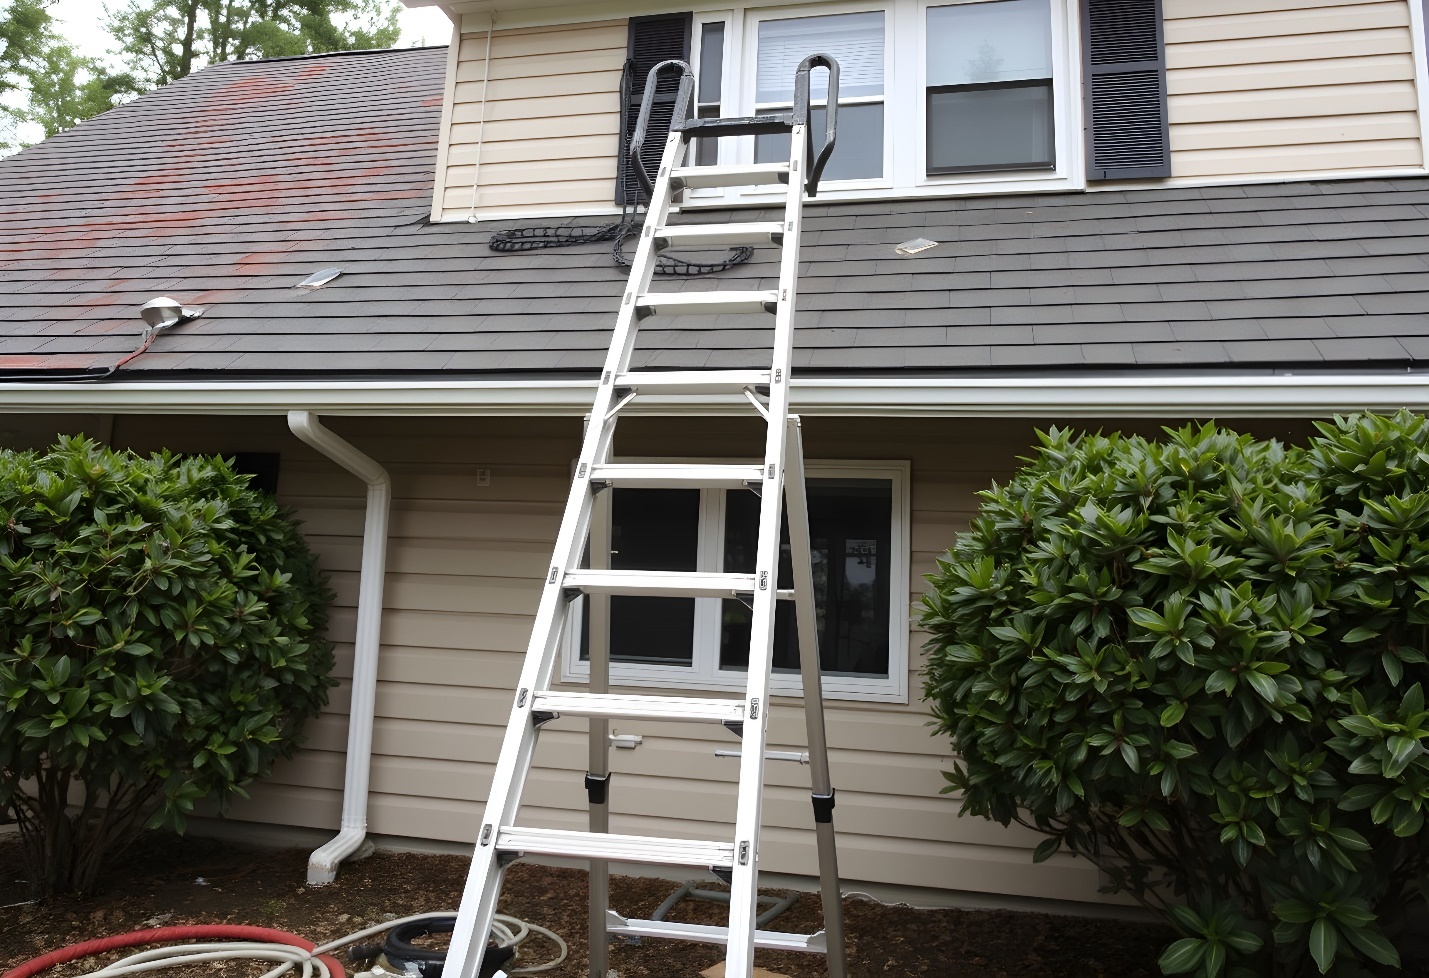
Ladder Safety Tips: Solid Ground and a Helping Hand
Make sure your ladder is stable and set up on firm ground that is level. If the ground is soft or uneven, use ladder levelers or a sturdy piece of plywood to even things out. The ladder should extend at least three feet above the edge of the roof, so you have something to hold on to when stepping off and back on.
If you can, recruit a helper. Having someone hold the ladder while you climb, pass tools back and forth, or simply spot you from below can be a huge safety boost. Plus, it's always good to have an extra set of hands if the tarp flaps or if you drop something mid-task.
Wear Boots with Good Grip and Gloves
This might seem obvious, but your footwear matters. Leave the running shoes in the garage. You want work boots or hiking boots with solid tread. Wear boots that grip shingles and give you stability on sloped surfaces. Avoid boots or shoes with smooth soles that can slide out from under you on a damp roof.
Gloves are just as important. Not only do they protect your hands from rough tarp edges, nails or splinters from wood strips, but they also give you a more secure grip when handling slippery materials. Leather work gloves or heavy-duty synthetic gloves are great options. They also help protect your fingers from blisters and pinches when securing boards or tying down tarp corners.
Find the Leak
Before you can throw a tarp over the problem, you need to figure out exactly where that leak is coming from. Sounds easy, right? Not always. Water has a sneaky way of traveling. What looks like a ceiling drip in your living room might be from a roof problem several feet away. The key is to play detective and track down the source with a mix of indoor and outdoor sleuthing.
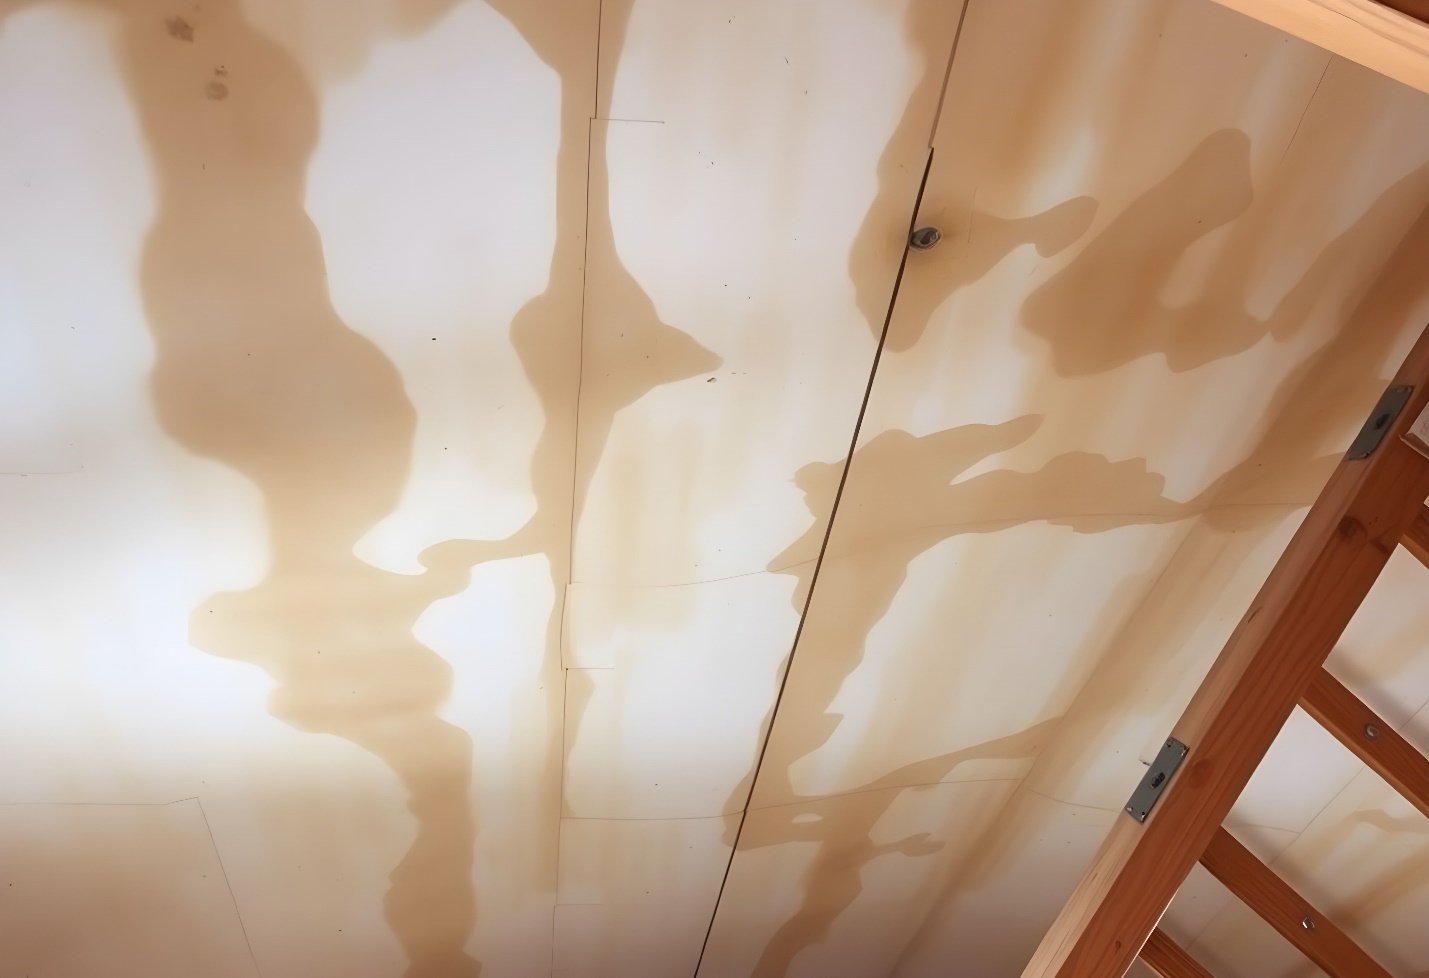
How to Spot Water Damage Inside Your Attic or Ceiling
Start your hunt inside. Check the attic during the daytime if you can because sunlight peeking through cracks or nail holes is a dead giveaway. Bring a flashlight and look for damp insulation or stained wood. You may also detect moldy smells. Water follows framing, so check where rafters meet support beams. You might also notice shiny trails where water has run down the wood.
Inside the home, ceiling water stains usually show up as brown or yellowish rings. If the drywall is sagging or feels soft, the leak has been happening for a while. Mark the area so you can trace it back to the roofline later. And don't forget to check around chimneys, skylights and vent pipes; these are common trouble spots.
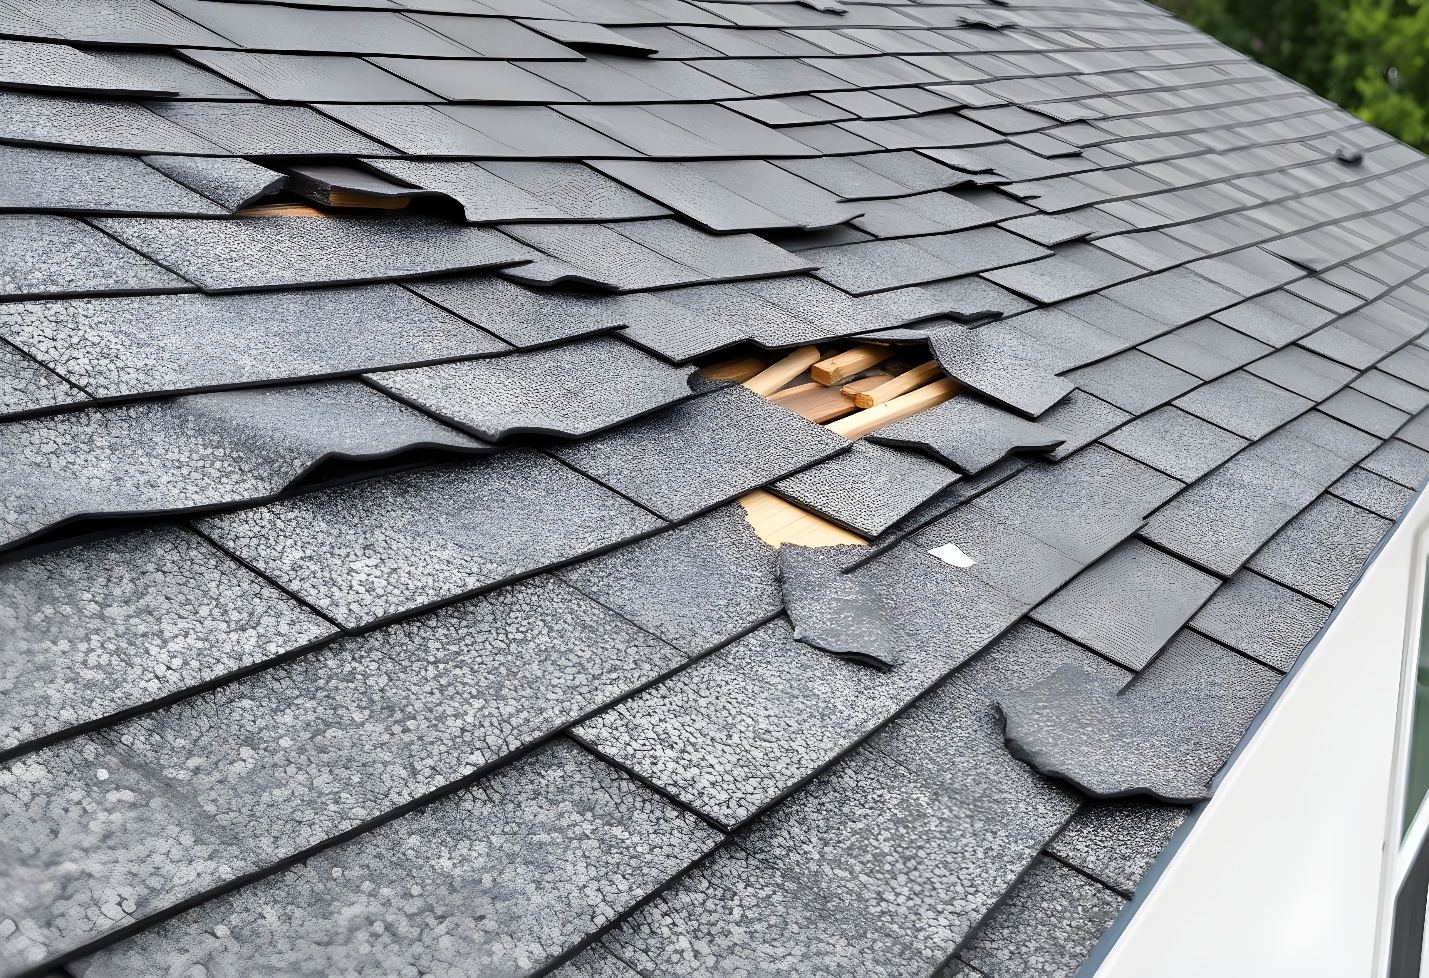
Look for Shingle Damage and More
Once you've narrowed it down from the inside, it's time to assess the roof. Shingle damage is the most common culprit. Look for lifted, curled, cracked or missing shingles, especially after high winds or hail. Areas where shingles appear darker than the rest could be water-soaked.
Missing or damaged flashing around roof penetrations (like vents, chimneys or satellite dishes) is another hotspot for leaks. Flashing creates a watertight seal, but over time, it can rust, loosen or shift out of place. Be sure to keep an eye out for places where water may pool. This could signal poor drainage or sagging in the roof decking.
Use Binoculars or a Drone
Not comfortable climbing up just yet? No problem. A set of high-quality binoculars can give you a close look at shingles, flashing and valleys without leaving the ground. Survey the roof from all angles. Sometimes what you miss from one side is visible from another.
If you're a tech-savvy homeowner (or just like gadgets), using a drone is a great option too. Many drones offer high-res video or photo capability that lets you scan your roof safely and thoroughly from the yard. It's especially helpful for steep or multi-story roofs where climbing would be risky.
Step-by-Step: How to Tarp a Roof Leak
Step 1: Clear the Area. Remove debris, branches or loose shingles.
Step 2: Measure and Cut the Tarp. Cover the damaged area and make sure there is plenty of overlap.
Step 3: Position the Tarp. Start at the roof peak and work your way downward.
Step 4: Secure the Tarp. Nail or screw down 2x4s over the tarp edges (or use weighted boards if you can't nail into the roof).
Step 5: Double-Check Everything. Make sure the wind won't lift the tarp and that water can drain properly.
Find quality roof tarps now.